Mounting options for LoRa Antennas:

Antennas are critical to the performance of a LoRaWAN and optimal positioning and secure mounting will ensure the best signal propagation and coverage can be achieved. By paying attention to your antenna assembly and its mounting you can significantly improve the transmission distances and penetration of low-energy LoRa signals.

Brackets and mounts for LoRa antennas:

We have a comprehensive range of bracketry for securing a LoRa antenna in an optimal position. This is designed to work with theN-type connector that is typically found on outdoor LoRa antennas.Here are the bolts and brackets for mounting LoRa antennas:

[A] L mounts are right-angled, heavy-duty wall-mounted brackets made from stainless steel or other strong non-staining alloys. Their “L” shape supports an antenna offset from the wall.

Within the bracket is a hole that the N-connector of the antenna can fit into. The connector passes through the hole and the connecting cable is secured to it from underneath the bracket. You can also use an N-type bulkhead connector with this bracket.

They can be attached to a wall with masonry plugs and screws. Choose L-brackets for simple elevated mounting of low-profile outdoor LoRa antennas.

[B] U-Bolts are a cost--effective but secure mounting solution for pole mounting antennas. This mounting equipment is best for omnidirectional antennas or collinear array antennas that need to achieve good elevation.

An N-connectorLoRa antenna can be secured using the paired U-shaped threaded bolts and corresponding pairs of hex nuts. A pole or mount is needed for the U-bolts to hold with the hex nuts and bracket securing the grip of the bolts to keep an antenna secured in an upright position.

[C] Wall mounts are low profile stainless steel brackets that are secured to the wall. They carry a ledge with an opening that an N connector can be inserted into for mounting an antenna. They are supplied with wall plugs and screws for securing the mount to masonry.

[D] U-Bolt Swivel Antenna Pole Mount Bracket are special mounts with an articulated design that provides a range of adjustable mounting options and strong mounting platform. Due to its swivel design, the mast can bolt onto a variety of angled surfaces including roofs, attics, and chimneys. These corrosion resistant technical mounts can be used with both masts and direct surface mounting. The bracket can be used to secure a mast with a diameter of up to 1.75 inches.

Here are some quick tips for successful locating your antennas for the deployment of a LoRaWAN:

Ensure that you have the right antenna for the job:

  • Size: LoRa antennas should be an appropriate size for the LoRa signal wavelength. In the US, LoRa uses the 915MHz frequency band and needs their antenna elements to be sized according to a wavelength of 32.76 centimeters. ½ and ¼ wavelength antennas will perform as well as an antenna that matches this wavelength.
  • Type: as LoRa networks are decentralized networks with nodes that are potentially distributed over a great distance or mobile,omnidirectional LoRa antennas should be used. Both devices and LoRa gateways can use omnidirectional antennas. These antennas, when mounted at a height, transmit or receive signals equally in all directions on the horizontal plane, which provides greater flexibility in positioning.
  • Directional antennas are designed to receive and transmit most effectively in a single direction, and may prove inefficient for a LoRa deployment as they can only pull data from a single direction reliably. However if there is a fixed point-to-point link between a LoRa device and a specific gateway, a directional antenna will be effective and have much less interference.

Position for maximum line of sight

LoRa antennas should be positioned to provide maximum visibility to nodes within the network. Obstructions will impede and attenuate LoRa signals, meaning that line of sight becomes all the more important in urban areas, or regions of hills and dense vegetation. Indoor LoRa gateway can have an external LoRa antenna mounted outdoors to boost coverage. Clear obstacles in the antenna's vicinity that can be moved, like vegetation or temporary structures. Antennas usually need to have a minimum of a 70 centimeter radius clear of obstructions around them. Electrical and electronic devices that are nearby should also be moved to prevent interference, intermodulation and detuning.

Achieve as much height as possible

LoRa gateway antennas should be mounted outdoors and at height to gain optimal signal reception.Pole-mounting LoRa antennas at height will avoid obstructions from the building it is mounted on.

Ensure that your LoRa antenna is correctly oriented

The orientation of your antenna is critical for receiving LoRa signals. Poor orientation can mean that no signals can reach the antenna. Familiarize yourself with the antenna pattern. Omnidirectional LoRa antennas should be vertically mounted. Securing the antenna in a straight position means that the maximum coverage of the antenna will be achieved.

The polarization of the antenna must also be taken into account as it will determine how signals are received. LoRa signals are horizontally or vertically polarized. Ensure that the polarization of the gateway and devices within a LoRa network match.

Low-loss cable is best for connecting LoRa antennas

Your choice of antenna cable can significantly affect the performance of a LoRa antenna.Attenuation (signal-loss) along the cable length can mean that the signals that are ultimately received are significantly weakened. Low-loss cable, like LMR 200, is double-shielded to deliver exceptionally low attenuation rates. The length of cable used should also be kept as short as possible.

Safety considerations for mounting a LoRa antenna

Installation of a LoRa antenna requires care because of the hazards of working at height and the risks of electrocution to yourself and others nearby. If you cannot competently install an antenna, you should seek a professional installer to complete the job. Remember the following points when installing a LoRa antenna:

  • You must not attempt to mount a LoRa antenna outdoors in wet, windy, or stormy weather.
  • Never install an antenna near overhead power lines. Powerlines can be mistaken for guy wires or telephone lines so avoid all overhead lines.
  • Do not use a metal ladder for installation. Wear rubber-soled shoes, gloves and long-sleeved clothing to mount your LoRa antenna.

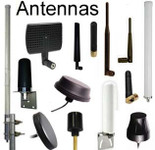
Mounts for LoRaWAN Antennas

Mounting options for LoRa Antennas:

Antennas are critical to the performance of a LoRaWAN and optimal positioning and secure mounting will ensure the best signal propagation and coverage can be achieved. By paying attention to your antenna assembly and its mounting you can significantly improve the transmission distances and penetration of low-energy LoRa signals.

Brackets and mounts for LoRa antennas:

We have a comprehensive range of bracketry for securing a LoRa antenna in an optimal position. This is designed to work with theN-type connector that is typically found on outdoor LoRa antennas.Here are the bolts and brackets for mounting LoRa antennas:

[A] L mounts are right-angled, heavy-duty wall-mounted brackets made from stainless steel or other strong non-staining alloys. Their “L” shape supports an antenna offset from the wall.

Within the bracket is a hole that the N-connector of the antenna can fit into. The connector passes through the hole and the connecting cable is secured to it from underneath the bracket. You can also use an N-type bulkhead connector with this bracket.

They can be attached to a wall with masonry plugs and screws. Choose L-brackets for simple elevated mounting of low-profile outdoor LoRa antennas.

[B] U-Bolts are a cost--effective but secure mounting solution for pole mounting antennas. This mounting equipment is best for omnidirectional antennas or collinear array antennas that need to achieve good elevation.

An N-connectorLoRa antenna can be secured using the paired U-shaped threaded bolts and corresponding pairs of hex nuts. A pole or mount is needed for the U-bolts to hold with the hex nuts and bracket securing the grip of the bolts to keep an antenna secured in an upright position.

[C] Wall mounts are low profile stainless steel brackets that are secured to the wall. They carry a ledge with an opening that an N connector can be inserted into for mounting an antenna. They are supplied with wall plugs and screws for securing the mount to masonry.

[D] U-Bolt Swivel Antenna Pole Mount Bracket are special mounts with an articulated design that provides a range of adjustable mounting options and strong mounting platform. Due to its swivel design, the mast can bolt onto a variety of angled surfaces including roofs, attics, and chimneys. These corrosion resistant technical mounts can be used with both masts and direct surface mounting. The bracket can be used to secure a mast with a diameter of up to 1.75 inches.

Here are some quick tips for successful locating your antennas for the deployment of a LoRaWAN:

Ensure that you have the right antenna for the job:

  • Size: LoRa antennas should be an appropriate size for the LoRa signal wavelength. In the US, LoRa uses the 915MHz frequency band and needs their antenna elements to be sized according to a wavelength of 32.76 centimeters. ½ and ¼ wavelength antennas will perform as well as an antenna that matches this wavelength.
  • Type: as LoRa networks are decentralized networks with nodes that are potentially distributed over a great distance or mobile,omnidirectional LoRa antennas should be used. Both devices and LoRa gateways can use omnidirectional antennas. These antennas, when mounted at a height, transmit or receive signals equally in all directions on the horizontal plane, which provides greater flexibility in positioning.
  • Directional antennas are designed to receive and transmit most effectively in a single direction, and may prove inefficient for a LoRa deployment as they can only pull data from a single direction reliably. However if there is a fixed point-to-point link between a LoRa device and a specific gateway, a directional antenna will be effective and have much less interference.

Position for maximum line of sight

LoRa antennas should be positioned to provide maximum visibility to nodes within the network. Obstructions will impede and attenuate LoRa signals, meaning that line of sight becomes all the more important in urban areas, or regions of hills and dense vegetation. Indoor LoRa gateway can have an external LoRa antenna mounted outdoors to boost coverage. Clear obstacles in the antenna's vicinity that can be moved, like vegetation or temporary structures. Antennas usually need to have a minimum of a 70 centimeter radius clear of obstructions around them. Electrical and electronic devices that are nearby should also be moved to prevent interference, intermodulation and detuning.

Achieve as much height as possible

LoRa gateway antennas should be mounted outdoors and at height to gain optimal signal reception.Pole-mounting LoRa antennas at height will avoid obstructions from the building it is mounted on.

Ensure that your LoRa antenna is correctly oriented

The orientation of your antenna is critical for receiving LoRa signals. Poor orientation can mean that no signals can reach the antenna. Familiarize yourself with the antenna pattern. Omnidirectional LoRa antennas should be vertically mounted. Securing the antenna in a straight position means that the maximum coverage of the antenna will be achieved.

The polarization of the antenna must also be taken into account as it will determine how signals are received. LoRa signals are horizontally or vertically polarized. Ensure that the polarization of the gateway and devices within a LoRa network match.

Low-loss cable is best for connecting LoRa antennas

Your choice of antenna cable can significantly affect the performance of a LoRa antenna.Attenuation (signal-loss) along the cable length can mean that the signals that are ultimately received are significantly weakened. Low-loss cable, like LMR 200, is double-shielded to deliver exceptionally low attenuation rates. The length of cable used should also be kept as short as possible.

Safety considerations for mounting a LoRa antenna

Installation of a LoRa antenna requires care because of the hazards of working at height and the risks of electrocution to yourself and others nearby. If you cannot competently install an antenna, you should seek a professional installer to complete the job. Remember the following points when installing a LoRa antenna:

  • You must not attempt to mount a LoRa antenna outdoors in wet, windy, or stormy weather.
  • Never install an antenna near overhead power lines. Powerlines can be mistaken for guy wires or telephone lines so avoid all overhead lines.
  • Do not use a metal ladder for installation. Wear rubber-soled shoes, gloves and long-sleeved clothing to mount your LoRa antenna.