


Tile Roof Mounts (2) for Cables, Wiring, Gear, Antennas
- SKU:
- AttachAll
- Availability:
- In Stock
- Weight:
- 2.00 LBS
Data Alliance


Tile Roof Mount for Cables: Box of Two (price is for qty 2)
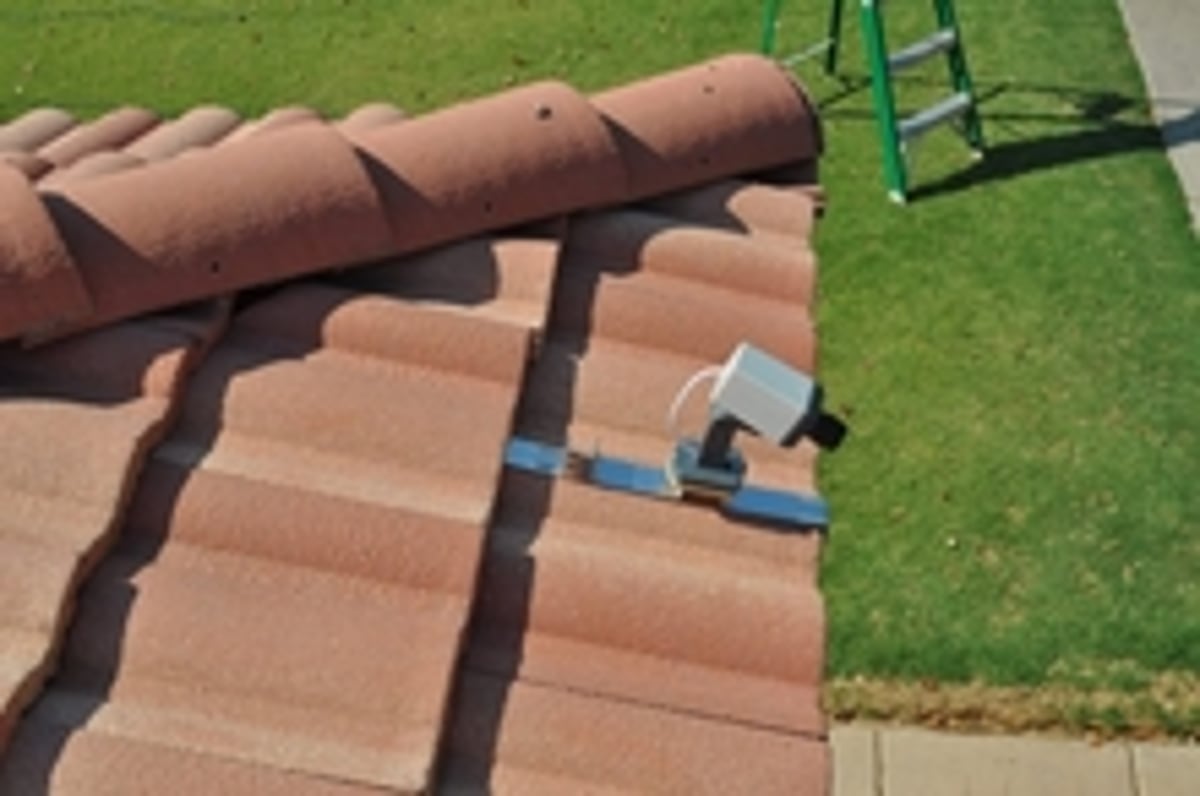
These mounts enable very secure attachment of cables, wiring and other gear to roof tiling's. The price is for two Attach All mounts (one box that contains two mounts).
Features
- Price includes 2 mounts (packaged in one box that contains two mounts).
- Easy installation
- NON-PENETRATING
- NO SPECIAL TOOLS OR ADHESIVES NEEDED
- Made of Galvanized Steel and Powder coated for Long-Lasting Corrosion Resistance
- Will not void roof warranty
- Platform base mount works for both high profile and two channel concrete roof tiles.
Applications
- Conduits
- Wiring
- Roof Mounting
INCLUDES:
- 2x Roof Mounts
- 1x Screwkit
- 1x Instruction Slip
Instructions:
|
Step 1- Select Optimum Roof Location While aground, determine the proper location for the Platform and platform bases in accordance to the size and shape of your platform (not included). The recommended location to ensure maximum stability and support is on tiles located two (2) or more rows from the roof hip, having an unencumbered tile surface area of at least sixteen (16) square feet as measured above the assembly. As a general rule, NEVER affix the Platform Mount on any existing broken tile(s), cut tiles or tiles located within three (3) feet of metal flashing, or hips, ridges and valleys of the roof body. If it is necessary to walk on tile surfaces, pressure should only be applied on the headlap of the tile units (lower 3-4 inches). This distributes the load near the bearing points of the tile. Movement on a roofing tile should be done with extreme caution. Please be careful and use a safe, appropriate sized ladder that is in good working condition. |
 |
|
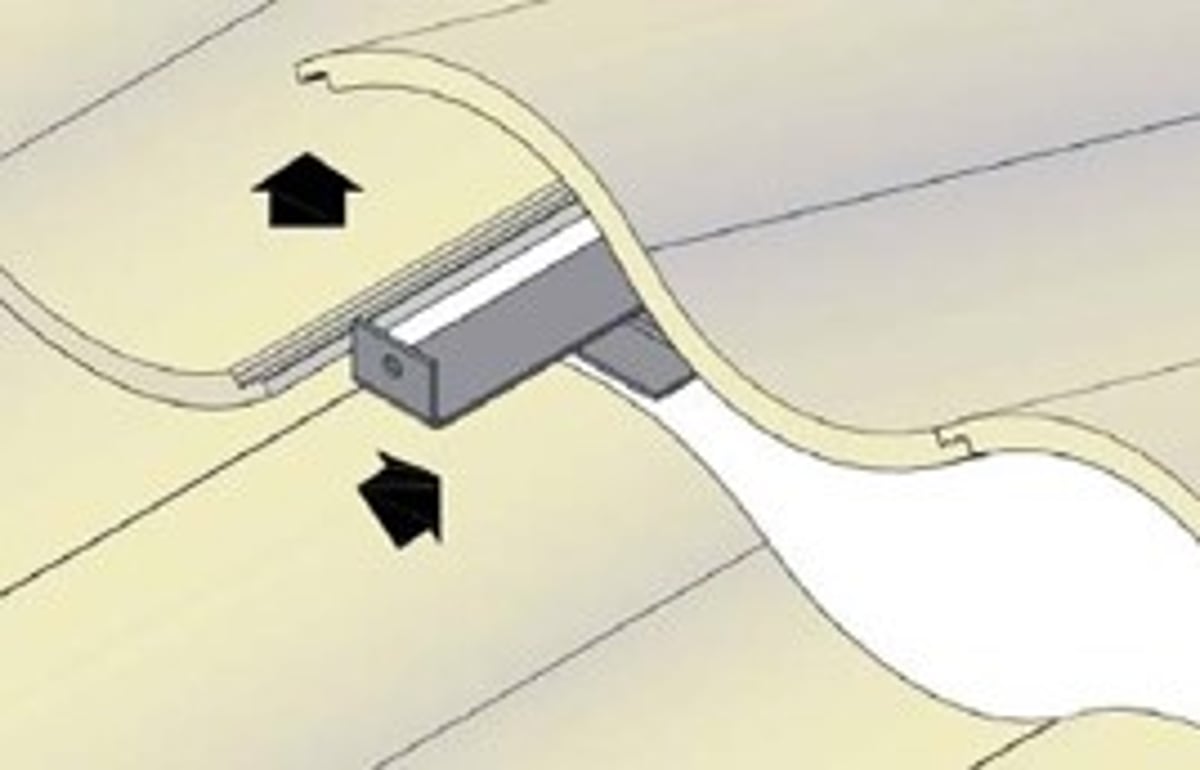
Step 2 - Position the Tongue Locate the tiles in the row above the area you selected for your first Platform Mount Base in step 1. Gently lift these tiles and slide a Tongue under them until the Tongue’s back hook reaches the back edge of the tile below it. Now lower the Tongue then pull it back towards you until the hook has seated itself to the tile below. The Tongue is now properly positioned. You can now lower the tiles you lifted. |
 |
|
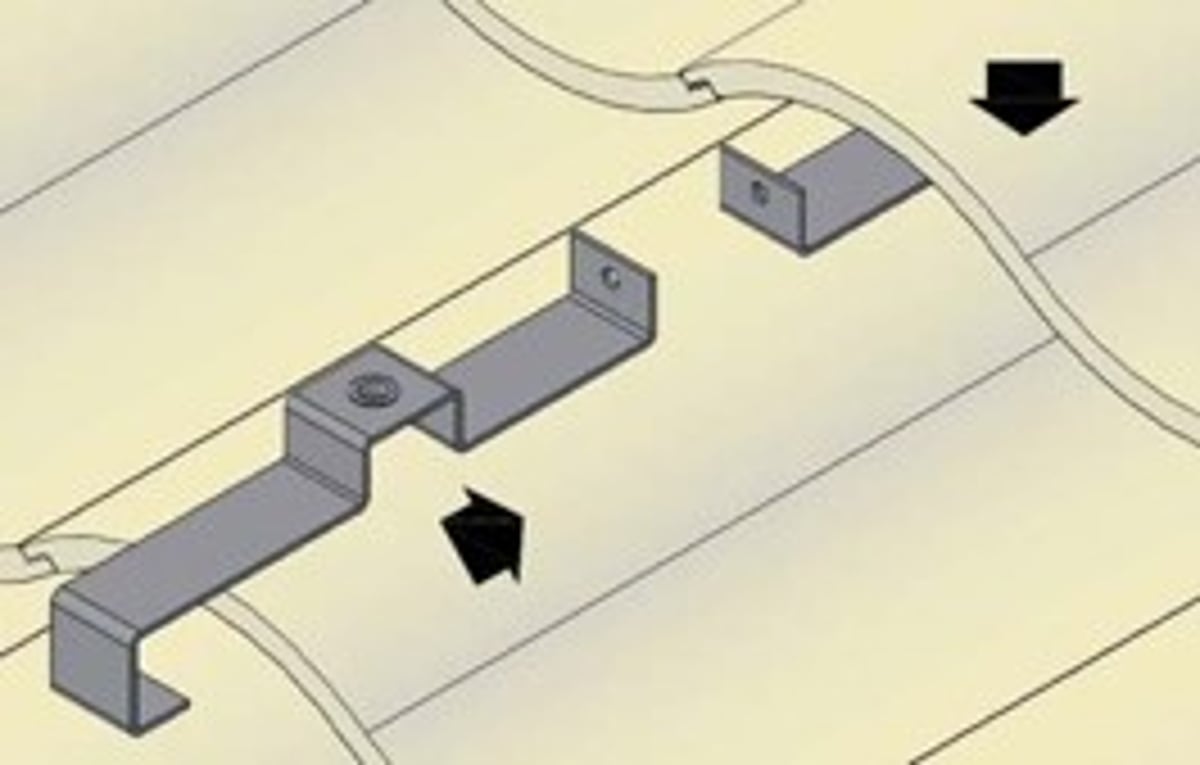
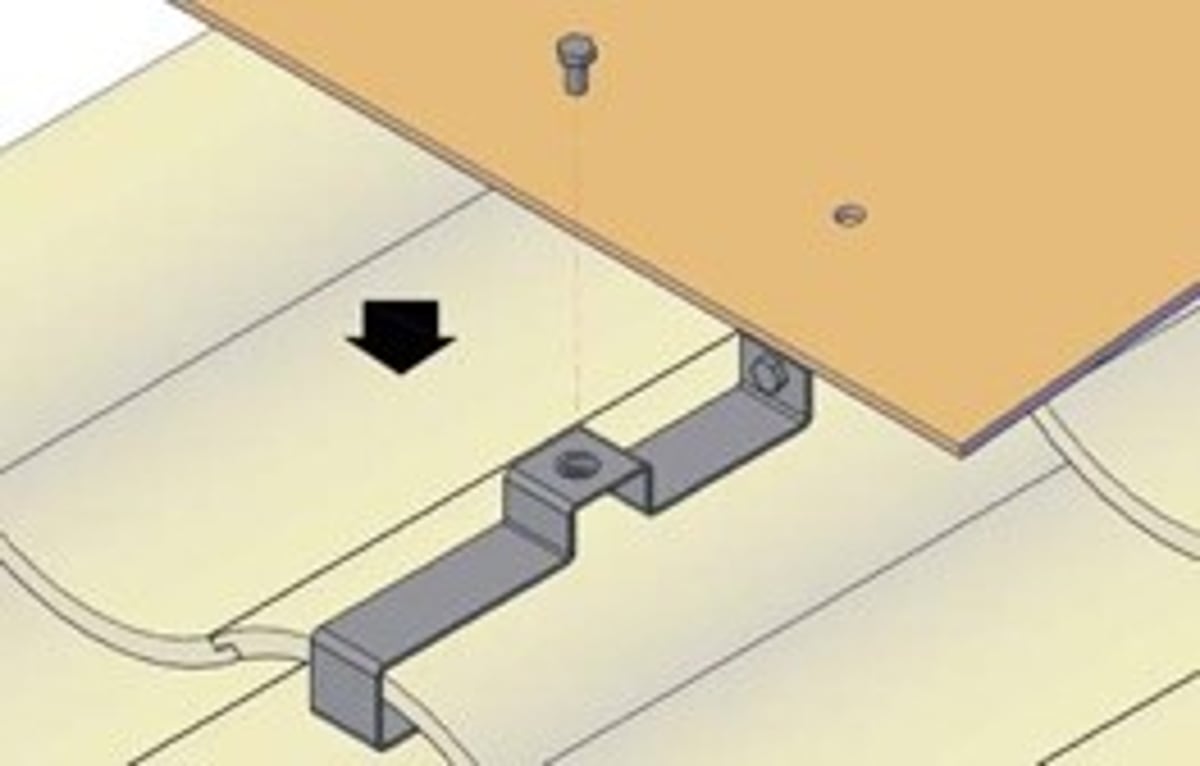
Step 3 - Position the Platform Mount Base Place the Platform Mount Base in the location selected in Step 1 and align it with the tongue. Now slightly lift the tile below the base and slide its hook under the tile as shown. |
 |
|
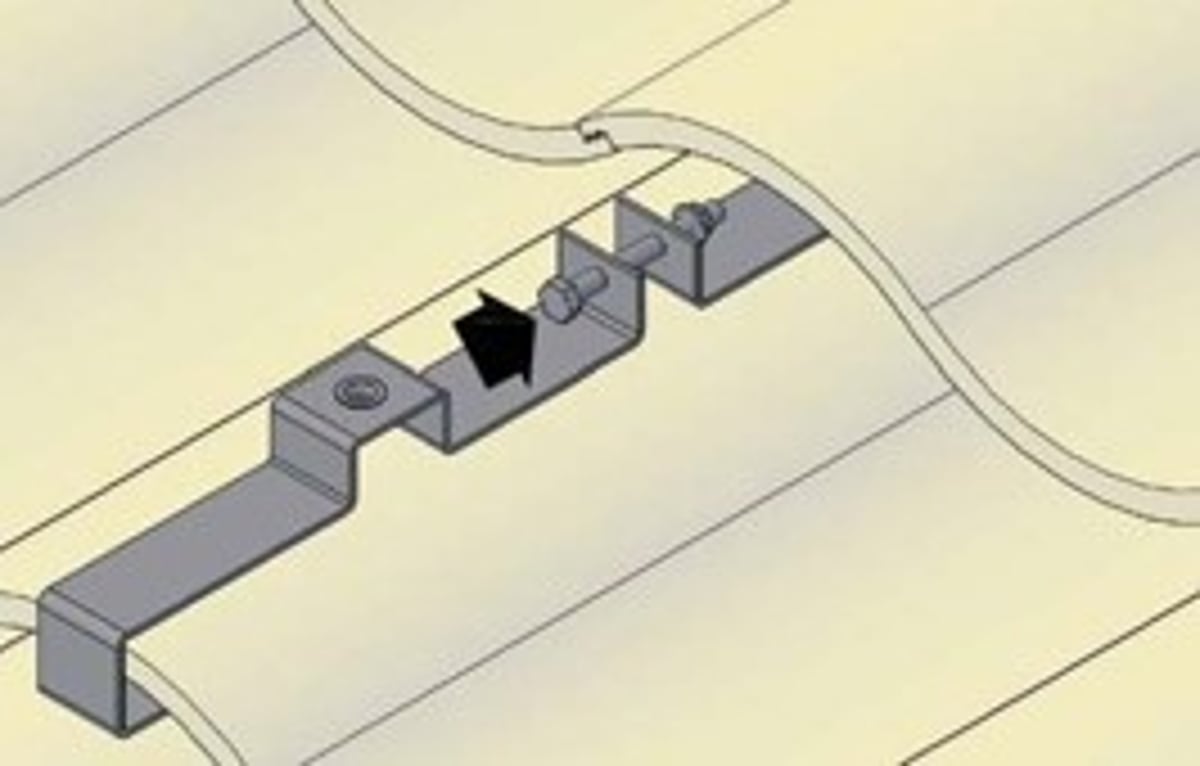
Step 4-Fasten Platform Mount Base & Tongue The pre-drilled hole in the Platform Mount Base and Tongue should line up. Insert the supplied hardware into the pre-drilled holes of the Platform Mount Base and Tongue then tighten with a wrench until the Platform Mount Base assembly is clamped firmly in place. The Platform Mount is now assembled. |
 |
|
Step 5-Secure Platform Mount Bases Repeat Steps 1-4 for each Platform Mount Base (A minimum of 2 bases per platform is recommended) |
 |
|
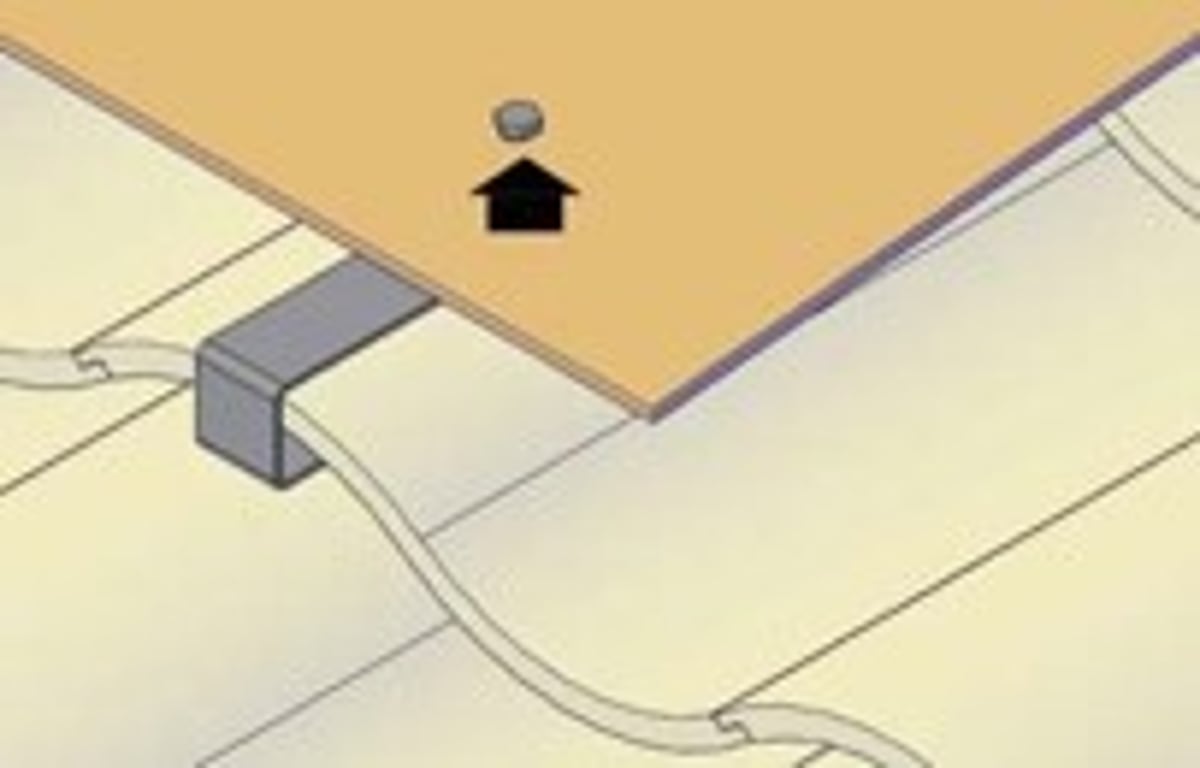
Step 6 - Attach Platform (i.e - Plywood ) Lastly attach your platform (not included) onto the Platform Mount Bases by drilling matching holes in the platform and using the provided hardware. |
 |
Related Roof Mounts: